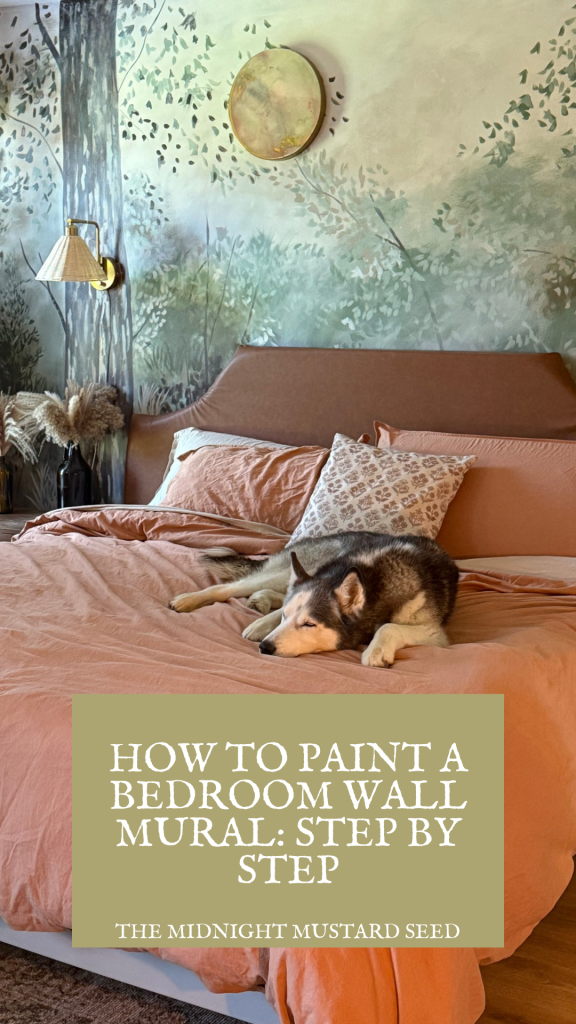
How to Paint A Bedroom Wall Mural: Step by Step
How to Paint a Bedroom Wall Mural: A Step-by-Step Guide to Transform Your Space
If there is one area of my house that I’ve neglected lately in terms of design, it’s my master bedroom. Life gets busy, you have little ones, and suddenly your room becomes a catch all space or looks a little bit unloved. My son is 2.5 now, and I decided it was time to give my bedroom some much needed TLC. How nice it would be, to have a cozy place to rest after the long days of wiping sticky hands and chasing little legs.
Having the encouraging parents that I do, I’ve been painting on my bedroom walls since high school. There is a storybook-style mural in my son’s room, but my own room has bare, dark gray walls. I felt like murals were, maybe, just for kids, so I neglected the thought of painting a mural in my own bedroom for a long time. Well, life has handed me tough season after tough season as of late, and I felt like it was time to bring something joyful into my lifeless room.
There came the challenge: design a wall mural that is serene, joyful, and mature all at the same time. I honestly didn’t plan a whole lot, which tends to be my MO. I followed my creative intuition and fought quite a bit with my painting as it progressed. Over all, I feel very happy with how it turned out, and it wasn’t too difficult to do!
If you’ve been itching to infuse your bedroom with a burst of personality, a painted wall mural is a great creative direction to take. It’s an impactful way to turn plain bedroom walls into a stunning focal point that really creates an entire atmosphere. Whether you’re dreaming of a galaxy wall mural in your master bedroom, magical forests for a child’s bedroom, or an eye-catching, earthy design in your living room, this guide will walk you through the mural painting process step by step. I’m sharing all my tips and tricks, inspired by my own crazy, creative adventures in wall painting to help you craft a bedroom wall mural that feels uniquely you. Let’s dive in!
Why Choose a Bedroom Wall Mural?
Before we get our hands messy with paint, let’s talk about why a painted wall mural is such a good idea. Unlike traditional wallpaper or bedroom wallpapers, a mural lets you customize every detail—your color palette, your feel, your story. It’s a creative outlet that transforms empty white walls or even a single part of the wall into a masterpiece. The possibilities are endless. The best part? You don’t need to be a seasoned artist to make it happen. With a little patience and the right approach, you’ll be amazed at what you can create.
Step 1: Plan Your Mural Design
The most important thing when starting your first mural is to have a clear vision, or at least, a decent concept of what you want to achieve. I firmly believe that it is part of the creative process to change things during the execution if your intuition calls for it. However, having a basic plan is always a good idea for you to get started. Are you picturing a galaxy wall mural that sparkles with vibrant colors? Or maybe a storybook forest with a sense of adventure for a child’s bedroom? Whatever your mural ideas, sketch them out first. I just use a light pencil to jot down concepts on paper before committing to the wall. I also try not to get too hung up on minute details in my sketching process because I know that my vision will change as it comes to life. Everyone has their own creative methods, so don’t be afraid to play around with what works best for you.
Pro Tip: You can join my mailing list at The Midnight Mustard Seed for exclusive mural ideas and painting tutorials!
Pick a design that complements the feel you want your room to have. For a master bedroom, a serene green wall mural or earth tones might bring calm, while a child’s bedroom could pop with more whimsical colors and themes. If you’re painting an entire wall, consider how the mural will interact with light switches or furniture. A good choice is to create a focal point that draws the eye without overwhelming the space. You want to achieve that balance between the mural, the walls, the furniture, and decor.
Step 2: Gather Your Supplies
You don’t need a ton of fancy tools, but having the right supplies makes the painting process smoother. Honestly, I only used three paint brushes and a few different shades of paint to create mine. It doesn’t take much! Here’s what you’ll need:
• Acrylic paint or latex paint (I used Sherwin Williams, but you can choose most any brand or color you like. I will list my colors below. Latex paint will be easier to cover up one day if you want to redesign your wall.)
• Paintbrushes (a small brush for details, plus larger ones for broad strokes)
• Small roller for covering large surfaces
• Painter’s tape for straight lines (optional)
• Drop cloth to protect your floor
• White chalk or a light pencil for sketching (optional)
• Paper towel and damp cloth for quick cleanups
• Soapy water for prepping the wall
• Color swatches to test your paint colors
Choosing Your Colors:
Color is a huge part of any wall mural. Before you ever pick up a brush, you need to choose paint colors that will help you tell your story. Do you want a mural that feels sunny? Try bright yellows or warm paint colors. Are you painting a field of flowers? Opt for earthy hues, and many shades of green. Pick bright colors of pinks, yellows, oranges, reds, or purples for your flower blossoms. A forest mural calls for woodsy tones of browns, greens, and terracotta. I will be using a rendition of these colors for my forest mural. My colors are Sherwin Williams Alabaster, Sherwin Williams Requisite Gray, Sherwin Williams Rock Garden, and Sherwin Williams Dark Olive. I also have hints of my old wall color, BEHR Shades On. Your colors will help set the mood of your mural, so keep that in mind as you choose your color palette.
Step 3: Prep Your Wall
A clean surface is key to a lasting, well executed mural. Start by wiping down your bedroom walls with soapy water and a damp cloth to remove dust or grime. If you’re working with white walls, you’re already starting with a great canvas. For darker walls, consider applying a coat of white paint or a lighter color as your base to make your mural designs stand out. Another great option is to use a colored ground as your base. For more on painting with colored grounds and color theory, you can read my article HERE.
Use painter’s tape to mask off light switches, trim, or any areas you don’t want painted. Lay down a drop cloth to protect your floors—this is especially important if you’re painting in a master bedroom or living room where furniture might be nearby. Move any furniture out of the way, and you are ready to start. Cleaning your wall properly ensures your mural lasts a long time, so don’t skip this step! A clean, smooth wall surface prevents peeling and keeps your mural looking crisp.
Step 4: Sketch Your Design
Now for the fun part—bringing your mural ideas to life! If you’re nervous about freehand drawing, the grid method is a game-changer. Here’s how it works:
1. Draw a grid on your sketch with a light pencil.
2. Lightly mark a corresponding grid on your wall using tape,chalk, or a pencil (something that wipes off easily or is easily removed).
3. Transfer your design square by square to keep proportions accurate.
For larger murals, like an entire wall, consider using a projected image. You could also project the design onto the wall with a projector for precision. If you’re going for straight lines (like a horizontal line or vertical line in a geometric design), painter’s tape is your best friend.
I love sketching with my paint brush. If you mess up, just paint over your mistakes. I know this may feel intimidating for some, so feel free to use a pencil or chalk. This step is all about building confidence in yourself and your design.
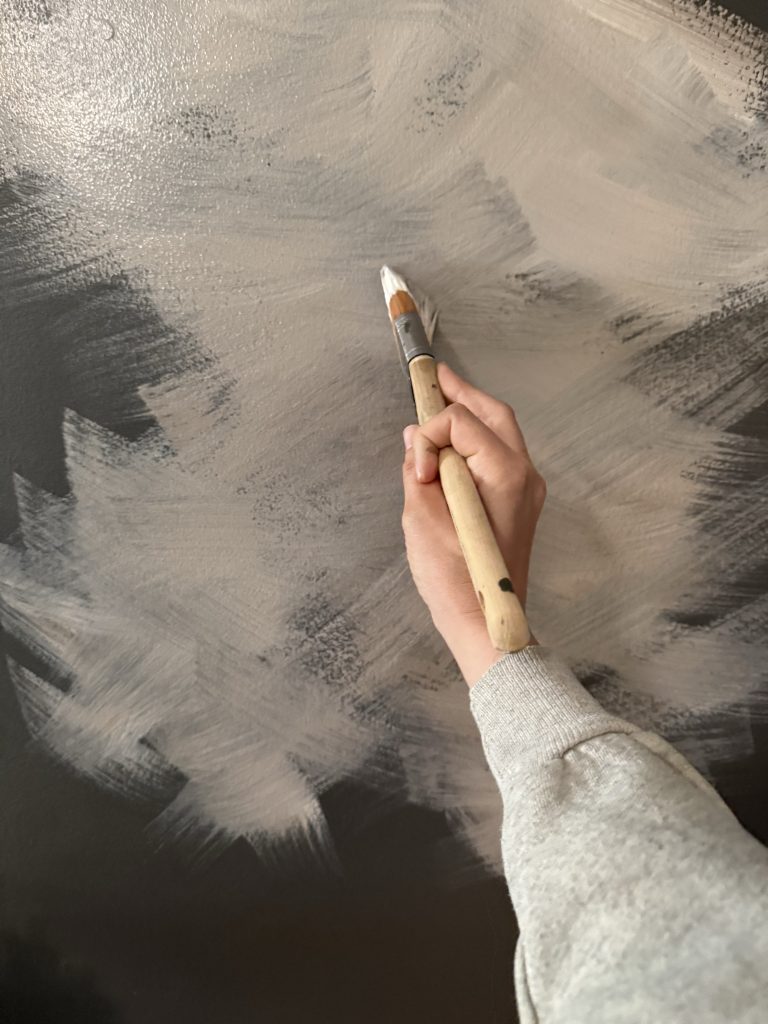
Step 5: Paint the Base Color
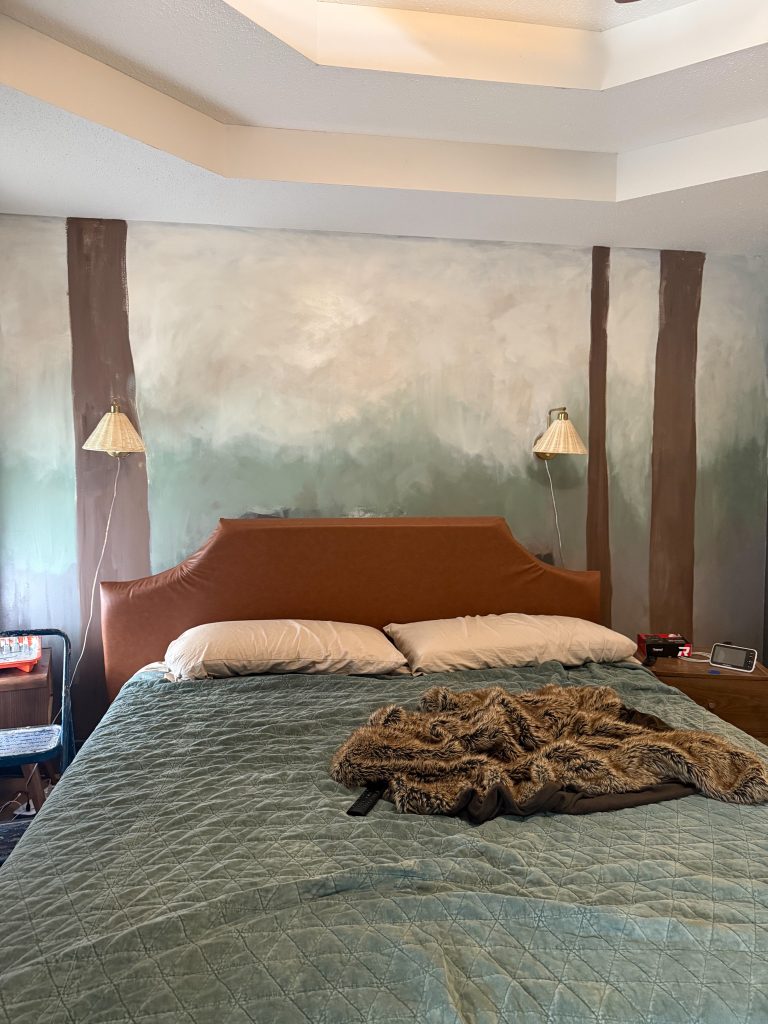
Start with your background color. For my wall mural, I am creating a forest scene using earth tones with hints of green and teal. My other walls are a warm gray brown, so I’m trying to tie all the colors of my palette together in this mural. For an outer space theme, a dark paint like navy or black creates a great base. Use a small roller for even coverage on large surfaces, and a small brush for edges near light switches or corners. In my forest mural, I will be mixing areas of light and dark in my base coat to help create the illusion of depth. Brighter whites towards the “sky” area give that feeling of openness outdoors and darker tones of gray towards the bottom help create a sense of weight in the ground. Let the base coat dry completely (open a window to avoid paint fumes). This might take a few hours, but patience is key. A solid base sets the stage for your mural to shine.
Step 6: Add the Main Design
Time to make magic happen! Dip your brushes into your chosen paint colors—I like using interior latex for ease of changing the room down the line. Acrylic paint is a good choice for its versatility and vibrant colors, but you will probably have to prime your wall again before you repaint later, should you choose to. Start with the larger elements of your design, like the planets in a galaxy wall mural or the trees in a forest.

Work from the background to the foreground to create a sense of depth. I like to use one color of paint and block out all the areas that specific color can be found. You could also block out dark areas and light areas first. It’s really a matter of preference. For example, I will hit all darker valued areas like the tree trunks with my darkest color-Turkish Coffee. Next, I’ll build my second layer, including the sky and loose tree bark details, by adding the lightest areas with my lightest paint colors- SW Alabaster and SW Requisite Gray Finally, I will hit all mid tone areas with my various shades of green. I even mix a few of my latex paints together to make just the right hue or value. I took SW Rock Garden and mixed it with Alabaster and Requisition Gray to get all different variations of green for my leaves and grasses. Now we have the bare bones of our mural. All values and major shapes have been added in.
For small details, like stars in your galaxy or leaves in your trees, use a small brush and take your time. If you’re adding little pops of color, like bright yellows or pinks, layer them strategically to make your mural pop. Don’t be afraid to mix different colors to create a unique style that reflects your personality. This step may take many layers to get it exactly where you want it. Be patient and trust the process. Take breaks if you feel like you are getting stuck or things are getting too muddied. Often times, all you need is a fresh eye to see your next steps. When I painted my first mural, I was terrified of messing up. But the best part? Every “mistake” turned into a chance to add something unexpected. Embrace the process—it’s your art! I still feel the fear of “messing up” as a professional artist, but art often goes through a messy or ugly phase to get to the “just right”.
Step 7: Refine and Add Details
Once your main design is in place, step back and assess. Does your mural need more contrast? Maybe a dark color to ground the design or a light color to highlight key areas? Use color swatches to test shades before committing.
Add small details to bring your mural to life—think twinkling stars, delicate vines, or subtle textures. If you’re painting a themed room, like an outer space bedroom, consider adding glow-in-the-dark painted stars for an extra wow factor.
Step 8: Step Back and Admire
You did it! Step back and take in your masterpiece. Your mural doesn’t have to be perfect to be lovely. Chances are, you are your own worst critic. How special it is that YOU painted that beautiful design on your own wall! If you painted a nursery mural or mural in your child’s bedroom, think how special they will feel that you created that special space for them. No painting is perfect, and I’m sure that yours feels like magic to them! I even look at my own and see things that I could add to or improve on. I may add things over time if I get a creative burst. That’s half the fun of a mural! It can grow and change because you made it with your own two hands!
Pro Tip: Snap a pic of your mural and share it on Instagram. Tag me at The Midnight Mustard Seed so I can cheer you on!
Common Mistakes to Avoid
• Skipping the prep: A dirty wall surface can ruin your mural. Always clean with soapy water first.
• Rushing the base coat: Let the base color dry fully to avoid smudging.
• Overcomplicating the design: Start simple for your first mural. You can always add more details later.
• Ignoring ventilation: Paint fumes can be intense, so keep windows open.
Why Murals Beat Traditional Wallpaper
I love a good wallpaper. They can make a beautiful statement or impact in interior design. Unlike bedroom wallpapers, a painted wall mural is fully customizable. You control the color palette, the design, and the look. Plus, murals are often more budget-friendly than high-end wallpaper and easier to update if your style changes. For a themed room, like a child’s bedroom or a cozy living room, a mural adds a personal touch that wallpaper just can’t match.
Final Thoughts
Painting a bedroom wall mural is a great way to transform your space into something magical. Whether you’re creating a space mural, a green forest mural, or something totally unique, the process is all about embracing your creativity and enjoying the process. Start with a clean surface, choose colors that feel good to you, and let your imagination run wild. The most important thing is to have fun!
Want more mural ideas or step-by-step guides? Join my mailing list at The Midnight Mustard Seed and check out my blog for other tutorials. I can’t wait to see what you create—drop a comment or tag me to share your own bedroom wall murals!