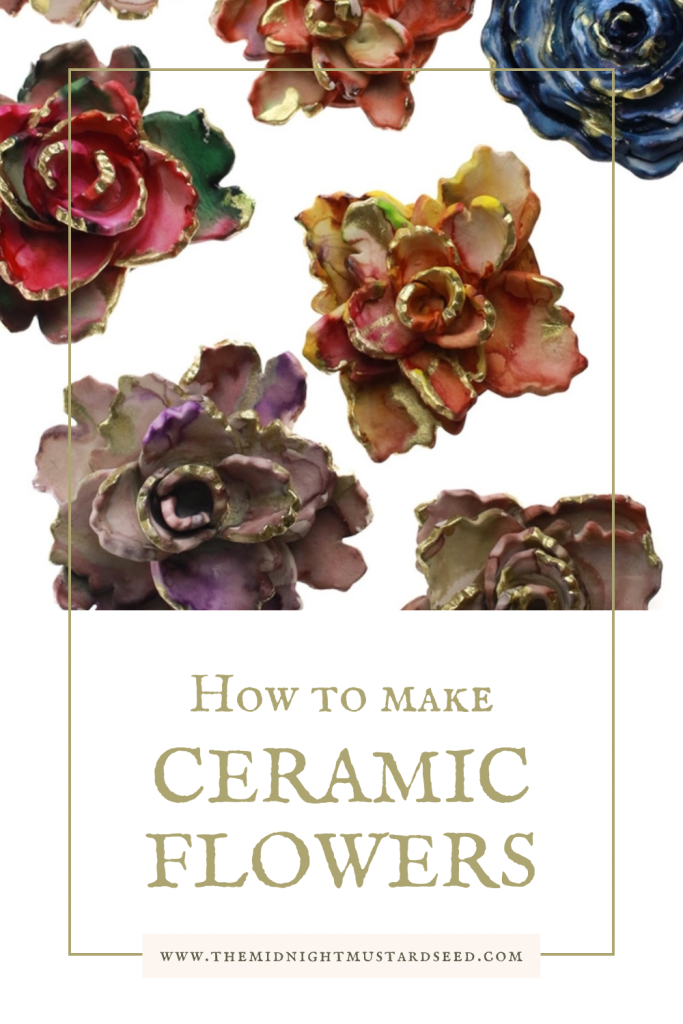
How To Make Your Own Ceramic Flowers From Pottery
This post contains affiliate links, which means I make a small commission at no extra cost to you. See my full disclosure here.
Spring is on the way, and for us, that comes with a small refresh in our home and garden. One of my favorite interior design tricks is to incorporate as many organic, nature-inspired elements into our house as possible. As a potter, I wanted to create something that would do just that! Ceramic flowers are a unique, whimsical way to bring earthy touches to your home. You don’t have to have a green thumb to have the perfect flower- make your own from clay!
Follow this pottery tutorial to create pretty, delicate flowers that don’t need any watering! In this lesson, I will show you guys how to create florals that can serve as part of a wall sculpture or sit as tabletop decor. Since it is what I work with all the time, I’ll be sculpting with pottery clay. Don’t have access to an electric kiln? No sweat! This tutorial works with air dry clay or oven bake clay as well!
Materials You Need:
- Clay (the type of clay will depend on if you have access to a kiln or oven. Read below)
- Wooden rolling pin
- Petal Cookie Cutters
- Electric Kiln or Oven (optional)
- Ceramic Glaze (optional) OR
- Oil paints (optional)
- Paint brush (optional)
- Pottery Sponge (optional)
- Ceramic glaze (optional)
Sculpting Clay Flowers From a Slab
The first thing we are going to do is prepare our slab of clay. Your clay should be wet and workable, but not so wet that it feels like slop. Think of the ideal clay to work with as cookie dough. Take your clay and roll it out to about a 1/4” thickness. If your slab is too thick, you will end up with bulky flowers and a heavy sculpture. Once our slabs are the right thickness and are nice and smooth, we are going to take our petal cutters and cut several petals of each size. Be sure to group petal cutters that are alike together to make a variety of flowers. You can also create your own petal templates from paper or cardboard and cut around them with a knife or Xacto.
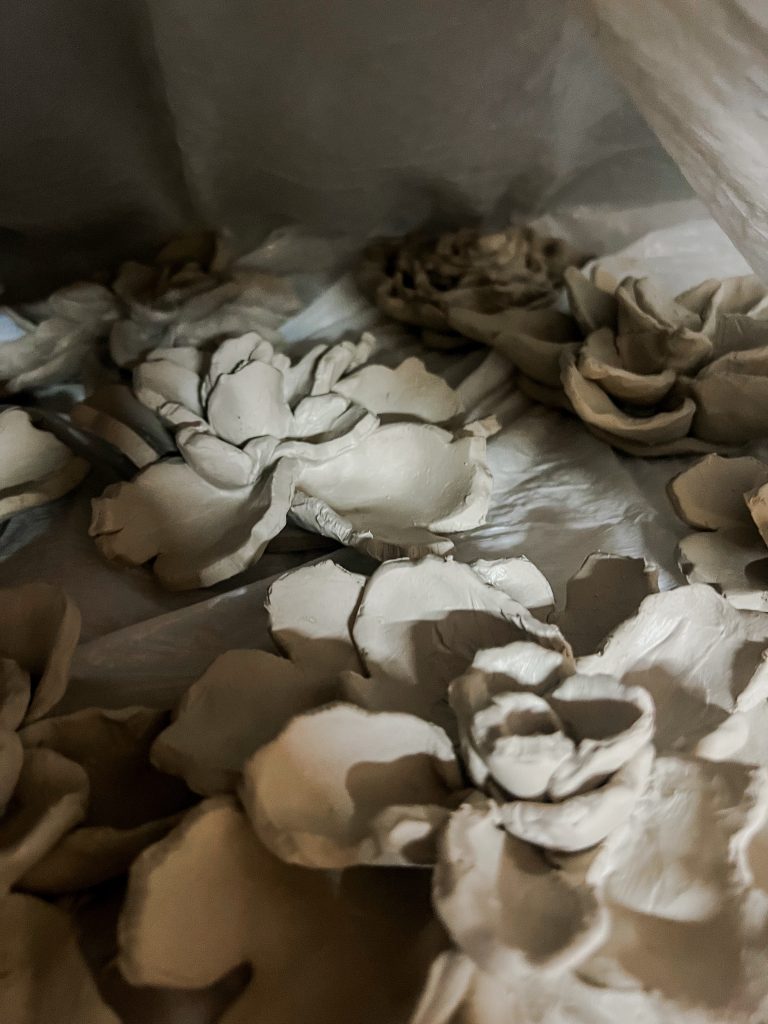
Once petals are cut out and grouped according to sizes and shape, we are going to form them into a three dimensional petal. Take the bottom of the petal (where it attaches to the center of the flower) and pinch the sides together. This will create a fold that takes the petal from flat to more realistic. Repeat this step with all petals. Now is time to build up the flower by attaching the petals to each other. You can either start with the innermost, smallest petals OR the outer petals. I typically use my judgement on where to start based on how open my flower bloom will be. If it is a flower blossom that isn’t fully opened, I will start with the innermost petals and build outward. If it is a fully opened flower head, I will start with the largest petals and work my way inward. If you are using pottery clay, be sure to score and slip your pieces as you add them. This will help create a ceramic “glue” that will form strong attachment points that will strengthen your sculpture. For more on scoring and slipping or other pottery techniques, check out my post on handbuilding
*For wall sculptures, I recommend cutting a circular shape as a base to build your flower upon. If you have a base piece to attach your petals to, the less likely you are to distort the petal shapes as you build. I cut a circle out and attach a small loop at the top for my wall flowers to hang from.

Once all petals to your flower have been added and you are happy with its basic form, it is time to smooth and refine the shape. If you have edges that are too thick or bulky, take your finger, dip it in water, and smooth those thick edges into more delicate petal edges. You can take a small paintbrush or damp sponge and smooth out any unwanted fingerprints or imperfections. Cover your flowers with a plastic grocery sack and let dry. Dry time will depend on what kind of clay you have used. Air dry clay will obviously dry pretty fast and will be slightly less temperamental than ceramic clay. It does not require any additional firing or curing and is ready to hang or paint depending on your desired results. Pottery clay will need to dry slowly over a week or two so that your sculpture will not crack. After it dries, you will need to bisque and glaze fire your final piece in a kiln.
Decorating Your Ceramic Flowers
Once your clay flowers have dried, it is time to decide how you would like to decorate them! If you used pottery clay, you will need to bisque fire your flowers first. Then, if you’d like to finish your flowers with a ceramic glaze, you can paint on your glaze and fire your pieces for the final time in a glaze firing. For more information on the basics of firing pottery in a kiln, you can check out my post HERE. You can also fire your unglazed pottery for a final time at the appropriate temperature and finish your fully fired piece with oil or ink paints.
If you have used air dry or oven bake clay, your flowers will be ready to paint as soon as they are fully dried (or have been oven baked according to the clay specifications). Paint your flowers with oil, acrylic, or alcohol ink paints. Let your creativity run wild and paint them however you see fit in your mind’s eye.
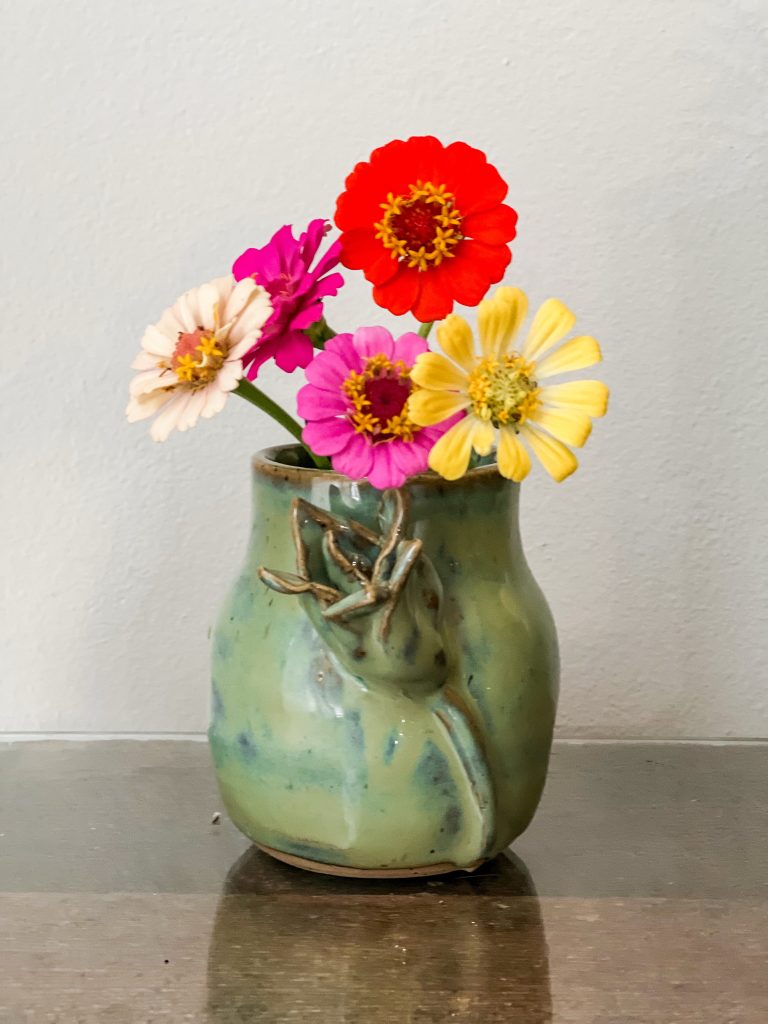
It’s time to hang your wall flowers or display them on a tabletop of bookshelf! Enjoy your handcrafted flowers that will never wilt! I hope you have enjoyed this tutorial on sculpting ceramic flowers! For more ceramic tutorials and projects, click HERE.