
How to Make Easy Homemade Nontoxic Soap with Loofah
Easy Homemade Loofah Soap Bars: The Perfect Nontoxic DIY Gift Idea
With the holiday season upon us (can you believe it’s already December?), I’ve been in full handmade gift mode over here. Gift giving is one of my favorite ways to care for my loved ones. Today, I’m excited to share this easy, but thoughtful homemade loofah soap recipe using a shea butter melt and pour soap base. These loofah soap bars are a great way to give the gift of gentle exfoliation, moisture, and nontoxic skincare all wrapped up in a beautiful, handmade package.
This DIY loofah soap is one of my favorite soap-making projects because it’s incredibly easy—no worries with lye safety like with making cold process soaps! It’s perfect for beginners, and even if it’s your first time making handmade soap, you’ll end up with professional-looking loofah soap bars that make great gifts for teachers, or neighbors!
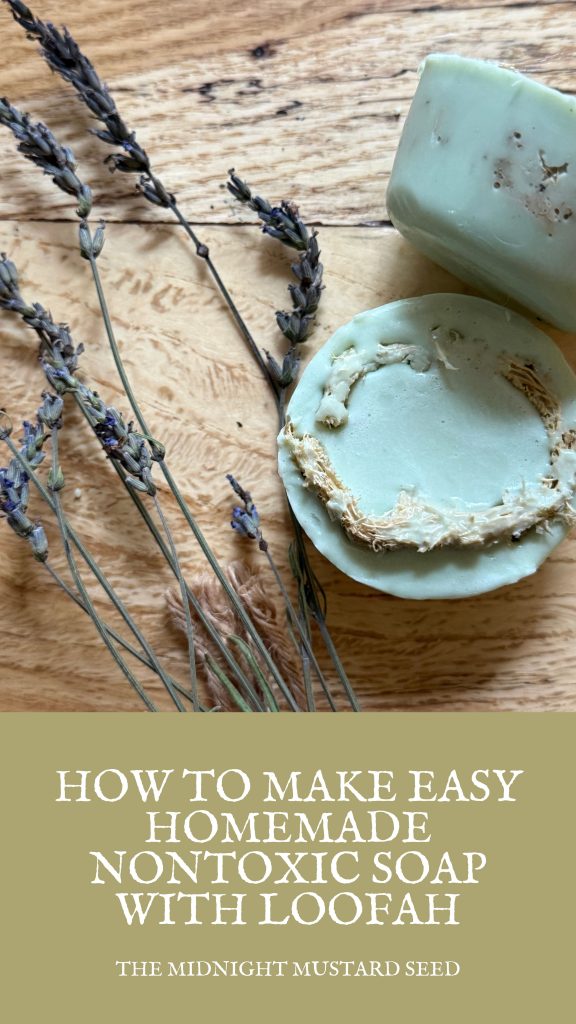
These bars feature a natural loofah sponge. Did you know the loofah comes from the luffa plant in the gourd family or cucumber family? We actually grew ours in the backyard garden! Loofah sponges are great for natural exfoliation that sloughs away dead skin cells, promotes blood circulation, and leaves skin glowing. Paired with the nourishing shea butter in the soap base, it’s especially wonderful for dry skin or sensitive skin, providing gentle exfoliation without harsh ingredients.
Plus, they’re a natural product made with natural ingredients—no plastics or toxins here! Let’s dive into this simple homemade loofah soap recipe.
Why You’ll Love This Easy Melt and Pour Loofah Soap
• Nontoxic and natural: Skip store-bought soaps full of questionable ingredients and harsh chemicals.
• Built-in exfoliator: The natural sponge from the loofah plant gently removes dead skin.
• Moisturizing: Shea butter is rich and creamy—perfect for dry winter skin.
• Customizable: Add lavender essential oil, lemon essential oils, fragrance oil, or mica powder for color and scent. I added nontoxic green tea fragrance that smells so good and clean!
• Quick project: Ready in under an hour, plus curing time.
• Budget-friendly DIY gift: Wrap with your favorite ribbon or string and they’re ready to gift!
Materials You’ll Need
Note: This post contains affiliate links, which means I may earn a small commission at no extra cost to you. See my full disclosure policy for details.
• Shea butter melt and pour soap base
• Natural loofah sponge or whole loofah (pre-sliced or cut your own)
• Silicone mold or soap mold (round or rectangular)
• Essential oils like lavender essential oil or drops of fragrance oil of choice
• Optional: Mica powder or soap colorant for tinting, coconut oil for extra moisture
• Tools: Heat-safe container, microwave or double boiler, serrated knife or bread knife, cutting board
Step-by-Step Homemade Loofah Soap Recipe
1. Prepare your loofah pieces: If using a whole loofah, soak it in warm water for a few minutes to soften. Use a serrated knife or bread knife on a cutting board to slice into loofah slices or small piece of loofah that fit your soap mold. Aim for about 1-inch thick loofah slices for a nice round shape bar. Place one loofah piece in the bottom of the mold for each bar.
2. Melt the soap base: Cut your shea butter melt and pour soap base into cubes. Place in a heat-safe container and melt in the microwave in 30-second intervals, stirring in between, or use a stovetop and double boiler on medium heat. Stir gently to avoid air bubbles.
3. Customize your soap mixture: Once fully melted (easy melt and pour—love it!), add a little bit of coconut oil if desired, a few drops of essential oil or fragrance oil and mica powder for color. Stir well. Be sure to check fragrance oil specifications so you don’t exceed the recommended amount of fragrance (ex. 2%-6% ratio of soap base).
4. Pour soap base: Carefully pour soap mixture over the loofah pieces, filling to the top of the soap. Spritz the top with alcohol to pop any air bubbles.
5. Let it set: Allow to cool on a hard surface for 1-2 hours, or pop in the fridge for faster setting.
6. Unmold and cure: Gently remove from the silicone mold. Wrap in plastic wrap or store in an airtight container. Let cure for a day or two for best results.
There you have it- beautiful homemade loofah soap ready for gifting. Happy creating, and may your holidays be filled with peace and joy! If you’re looking for more soap making projects or other DIY projects, check out my other tutorials HERE.
Blessings!
Samm


