How To Make Realistic Miniature Polymer Clay Food
This post contains affiliate links, which means I make a small commission at no extra cost to you. See my full disclosure here.
If you’ve been on TikTok-make or Pinterest at all, chances are you’ve seen the adorable miniature food that artists are making with polymer clay. Polymer clay is the first clay that I ever sculpted with many moons ago. Recently, I have been diving back into this versatile modeling clay because I have been crafting little things to go with my toddler’s needle felted friends.
When I was little, I made polymer clay foods for my dolls or little animals. They were so much fun to sculpt, but they were far from realistic. I just can envision my amateur, bright red hotdog with a squiggle of yellow mustard down the middle. I thought I’d give sculpting polymer clay foods another go, but this time I wanted to make them look as much like real food as possible. If you’d like to learn how to sculpt your own mini food out of polymer clay, then follow along with me in this simple clay tutorial.
Materials:
-Baking Sheet
-Pan Pastels OR
-Acrylic Paint
Mixing Clay Colors
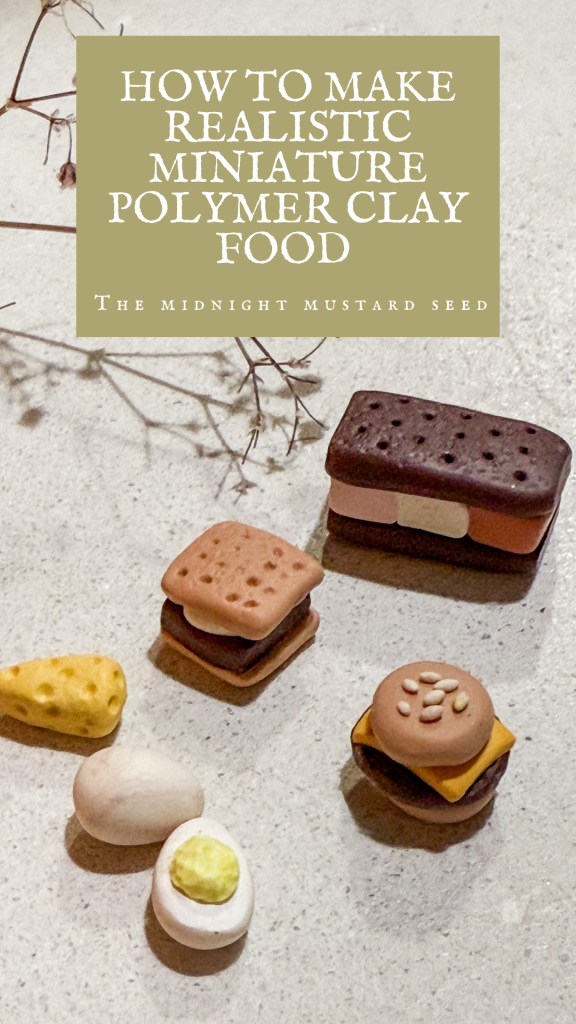
My first tip for starting your polymer clay food comes from my first mistake when I was a polymer clay newbie. If you want to make realistic food, I would recommend mixing your own colors of clay. Even though a hotdog is red, it is definitely not the bright red that your clay comes in. Use colors straight out of the package, and you’re likely to end up with cartoonish looking food. Instead, try mixing colors like you would paint, to get that perfect, realistic shade for your food. For a hotdog, you may mix a little red with a little chocolate brown. Here, I made a graham cracker color for my mini s’mores by mixing tan, yellow, white, and a burnt sienna color. It may take some time or additional mixing to get the colors just right, but it is worth the effort in the long run. The right color can make or break how realistic your mini food looks.
Creating Realistic Texture
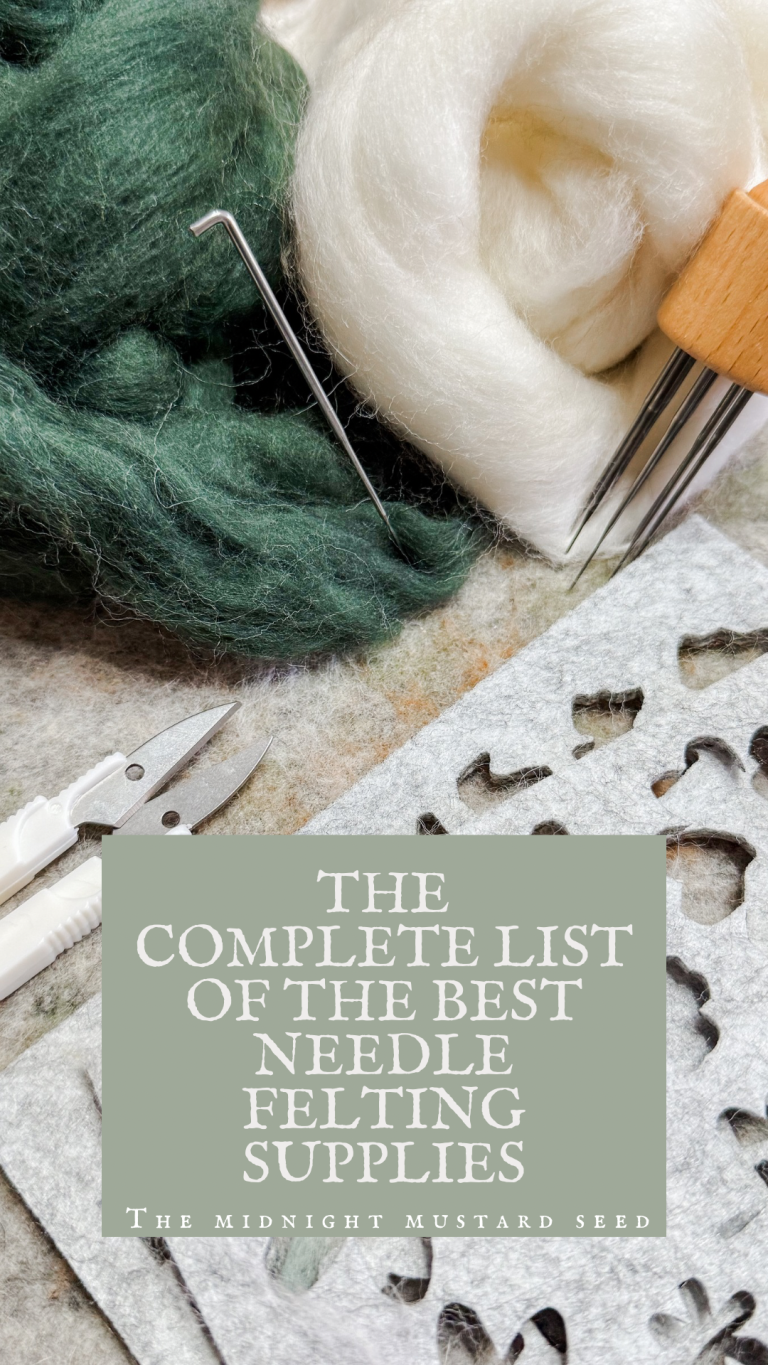
The next big piece of advice that I would really pay close attention to is to make realistic textures. You’re going to take your clay and sculpt or mold it into just the right shape. Shape alone isn’t enough to make your food look real. You will want give your food a realistic texture too! For my graham cracker, I rubbed a paper towel over my clay to give it that texture of a real cookie. using my needle tool, I added the perforation between the cookies and the signature indention holes on the tops of the grahams. To get realistic textures, you can use a stylus tool or even conventional things. Texture your clay with fabrics, texture rollers, clay mats, and more. If you want to know more about the tools you can use with polymer clay, check out my guide to polymer clay supplies HERE.
Baking Your Mini Food
Now that you have mixed just the right colors, sculpted and textured your mini food, it is time to bake it. Take your baking sheet and line it with parchment paper. Preheat your oven to 275 degrees Fahrenheit. Once it is up to temperature, place your clay foods on the prepared baking sheet and bake for 30 minutes. Remove from the oven and allow them to cool before moving on.
Painting On Details
Now it’s time for the finishing touches! Add extra depth and dimension to your mini clay food by painting on highlights or shadows. Pan pastels work nicely for this if you plan on sealing your food afterwards. If you don’t plan to seal, I’d recommend using acrylic paint. For my graham crackers, I am adding a light dusting of darker brown on the edges and the top of the cookie to give it that baked look.
I hope these tips will help you make some fun, realistic polymer clay foods! Mini food is the perfect addition to any dollhouse or accessories for your needle felted friends, if you’re like me. I think I’ll make a few mini heart cookies or candies next for Valentine’s Day. The options are endless and it is such fun! Happy sculpting!