A Step By Step Guide On Making Homemade Nontoxic Soap
Ever since I became a mom, I have really started to look at ingredients. What is in the food that we buy? What is in the candles we burn? What ingredients are in all of our personal care products? At the risk of sounding very crunchy and a little bit “woo woo”, the truth is that there are a LOT of additives and unnatural ingredients in most everything we use or consume.
I am a firm believer that most things are okay in moderation, but constant exposure to potentially harmful or untested additives just isn’t something that I’m interested in. I am someone who lives with an autoimmune disease and my need to make healthy choices is important. Do I enjoy the occasional Diet Pepsi when I’m nauseated? Yes I do. My mom swears it’s medicinal lol! Do I think it is a healthy practice to drink one everyday? Not really. I also want to set my little one up for good health with the choices we make. Sure, most things are out of our control, but what we consume isn’t.
Commercial soaps are no different in that many of them contain toxins or hormone disrupting components that can wreak havoc on our health. They may smell good. They may have a great lather, but they aren’t exactly what our bodies need to be at their healthiest. You know by now that I am easily pulled into learning new skills. I recently dove headfirst into the science of candle making which you can read all about HERE. Of course, I felt it was time to throw myself into soap making. In this step-by-step guide, I will teach you how to make your own soap at home! If you aren’t much of a DIY gal or you’re freaked out by lye water, you can shop my handmade soap in the shop.
The Different Types of Soap Making
We were at a farmers’ market and craft fair a few weekends back. There were several different soap booths so I decided to check them out. I noticed several booths that contained soaps made from goat’s milk that were cut into perfect little brown bars scented with essential oils. Another booth had colorful soaps with all different fragrances. These soap bars looked like what you’d find in our local boutique soap shop. They were hand cut, strong smelling, and very vibrant. There are benefits to using each type of soap, but the main thing that we need to recognize is that they were made using very different methods.
The two main methods for creating your own soap are hot process soap making and cold process soap making. Both have their own benefits and disadvantages. Hot process soap making uses a melt and pour method that is very beginner friendly. You simply choose your soap base, which can be made from olive oil, shea butter, or goat’s milk. The base is microwaveable so you would melt down your base in the microwave and then add scents, colorants, and any other additives. There is no intense chemical reaction like you would find in cold process soap making, making it a relatively safe activity that most anyone can do. It also takes much less time to cure so you can get that instant gratification from your soap project that you won’t get with cold process soap making.
Although hot process soap making is very easy, it does have its drawbacks. The extra heat from the microwave or heating process can cause certain scents to fade some. It is also difficult to add certain fats or additives like milk to your soap, so if superfats are super important to you, I’d opt for cold process. You are also limited to the melt and pour soap bases that are on the market so hot process soaps aren’t as customizable. There is a familiar look, feel, and smell to hot process soaps that have been made with commercial bases. If you want a bar that is very unique, with endless design possibilities, I would say that cold process is the way to go.
The cold process method is the process that we will learn together in this step-by-step tutorial. Because this kind of soap making uses a natural saponification process without any external heat, it creates beautiful soaps that are much milder and moisturizing on the skin, richer in ingredients, and have a gentle lather. We also have a lot more freedom as far as ingredients and limiting toxins goes! It may take a long time to fully cure, but the wait is absolutely worth it. You can also easily batch make soaps and get a big bang for your buck when they are ready. Because of the way that cold process soaps are made, it also purifies the fatty acids in the soap, making a higher quality soap all around.
Cold process soap is not without its risks. It uses the natural chemical reaction called saponification, that occurs when sodium hydroxide lye comes into contact with distilled water. This lye solution is caustic, meaning it can burn you, take the finish off of wood, eat a hole in your clothes, etc. You are going to want to mix your soap batter and lye solution in a safe place. Wear long sleeves, cover your surface with an old towel, and wear goggles when mixing! Work in a well ventilated area or open a window as well. That lye solution can create a brief vapor. Safety is very important in this process, but I promise it sounds a lot scarier than it is!
Materials:
Before you begin making your awesome, nontoxic soap, you’re going to need to gather a few essential supplies. A lot of these items you will have on hand in your kitchen, but it is very important NOT to use your utensils or bowls for food once they have been used for soap making.
You will need:
◦ Several medium to large glass bowls. At least three)
◦ Wooden utensils for mixing
◦ An immersion/stick blender with whisk attachment (you can find a cheap one here that works great for this).
◦ Safety goggles
◦ Rubber gloves
◦ A soap mold (I will be using a loaf mold)
◦ Soap cutter
◦ Fragrance oil
◦ 10.9 ounces of Distilled water
◦ 4.9 ounces Sodium hydroxide flakes
◦ 2 tsp Sodium lactate
◦ A soap base (I recommend this nontoxic one from Brambleberry)
◦ Natural colorants like these
◦ Dried flowers (optional)
◦ A food scale (no longer safe for food once you use!)
◦ A good soap recipe
◦ A food thermometer
Step-by-step Cold Process Soap
We will be using a simple soap recipe for this tutorial, but you can definitely hone your skills and create your own recipes with practice and a little bit of studying. it is always recommended to use a lye calculator like THIS one to determine the proper ratio of lye to fatty acids. Lye is not something to guess around with.
Measuring and Mixing the Lye Solution
The first thing we are going to do is measure and mix our lye solution. IMPORTANT NOTE: Do NOT use metal mixing bowls or utensils as they can react with the lye solution. Put on your rubber gloves and safety goggles. Make sure you are wearing long sleeves and closed toed shoes. Take a food scale and place one of your glass bowls on top of it. Then, zero out the weight, and measure out 4.7 ounces of lye flakes. Set that aside and grab another fairly large glass bowl. Pour 10.9 ounces of distilled water into that bowl. Now it is time to combine the lye flakes with the distilled water. IMPORTANT NOTE: ALWAYS ADD LYE FLAKES TO WATER. NEVER add water to lye flakes. This is a caustic reaction that can easily turn into a volcano if mixed the other way around. We don’t want solution splashing all over us or anything else. Very carefully and slowly, pour the lye flakes into the distilled water. Gently stir the mixture until the lye flakes are fully dissolved and set it aside. Be sure to stand back a little because it does emit somewhat of a vapor. This mixture will start to heat up. Put it somewhere safe for around an hour, maybe a little less, until it reaches a temperature between 110-130 degrees Fahrenheit. When it has reached a temperature in that range, carefully mix in the 2 tsp of sodium lactate.
Prepare Your Fatty Acids/Soap Base Mixture
Take your soap base (if you are using the one listed above) and microwave it until all chunks and murkiness disappear. Using your food scale, you need to measure out 33 ounces into your largest glass container. Pour the lye solution mixture into your soap base. Grab your immersion blender and carefully blend the two mixtures together for about 1 minutes. The mixture should now feel like cake batter when you stir it. If it is still too runny, blend in five minute increments until it reaches that consistency.
Adding the Fragrance Oils and Colorants

Fragrance oil strength one of those things that is personal preference. You can use 1 ounce for a lightly scented soap, 1.5 ounces for a moderate scent load, or 2 ounces for a strong smelling soap. I always opt for a stronger fragrance throw in both candles and soaps. I want to be able to smell clean, if you know what i mean. Using your whisk attachment, fully combine the fragrance oil of your choice with the lye/fatty acids mixture.
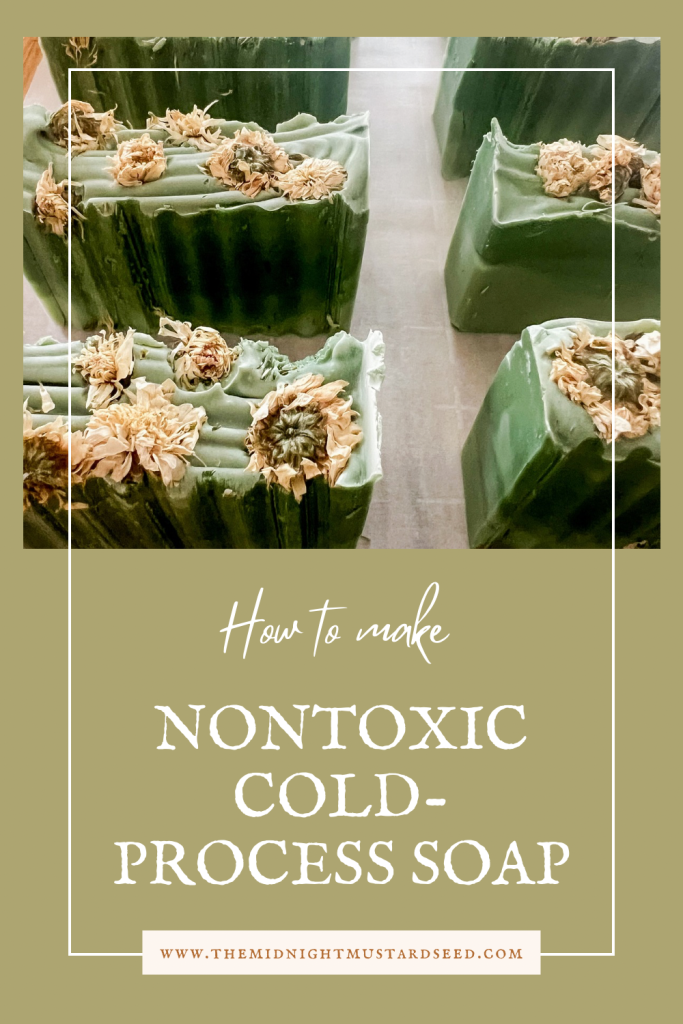
Colorants are also up for interpretation and you can add as much or as little as you’d like. For my soap, I divided the soap batter into three parts and mixed the natural green colorant at three different intensities to get a gradient color soap. You can make a soap loaf that is all one color or only two colors if you’d like. It is purely up to you. I used my whisk and mixed 1/8 tsp, then added another 1/8, and then another 1/8 tsp until I had three very different greens.
Pouring,Layering, and Decorating Your Soap
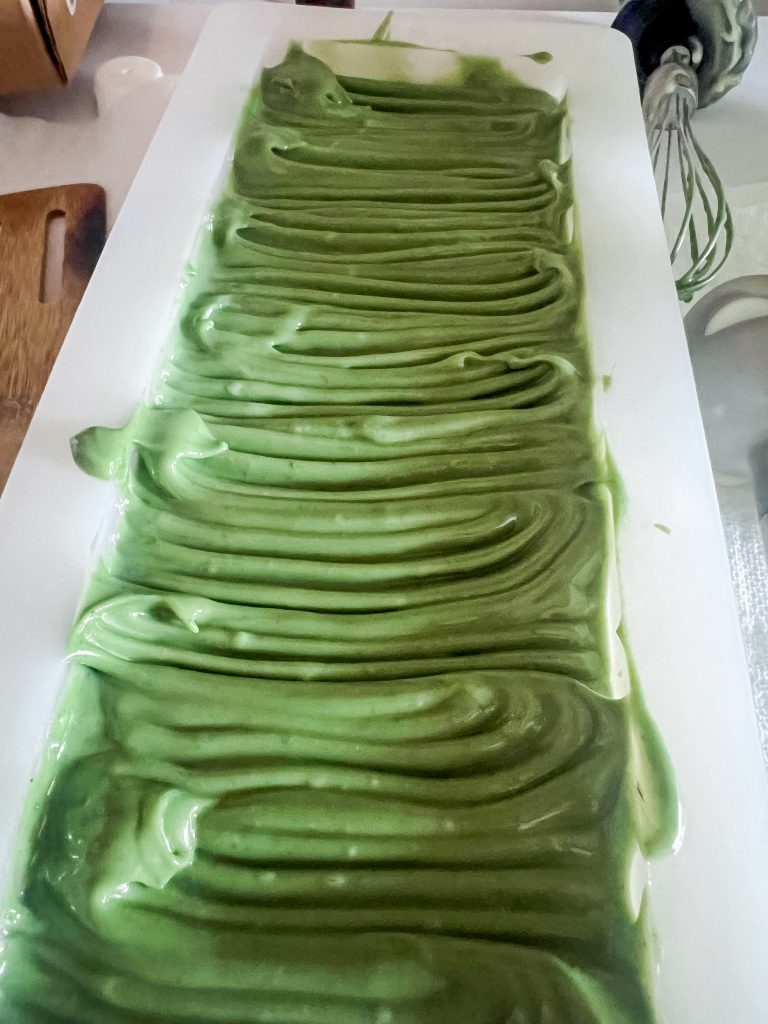
**This next step is only if you are pouring multiple colors of soap batter into your loaf mold. Pour your darkest soap mixture into the soap mold Then pour your medium toned soap mixture, and finally your lightest soap batter into the mold. Feel free to take a plastic fork, toothpick, or other disposable item and create a pattern on your soap loaf’s surface. You could also simply smooth this out with a rubber spatula. Sprinkle any dried flowers on top. Tap your loaf mold on the counter to bang out any bubbles, and let this harden for around 3 or 4 days.
Cutting and Curing Your Soap
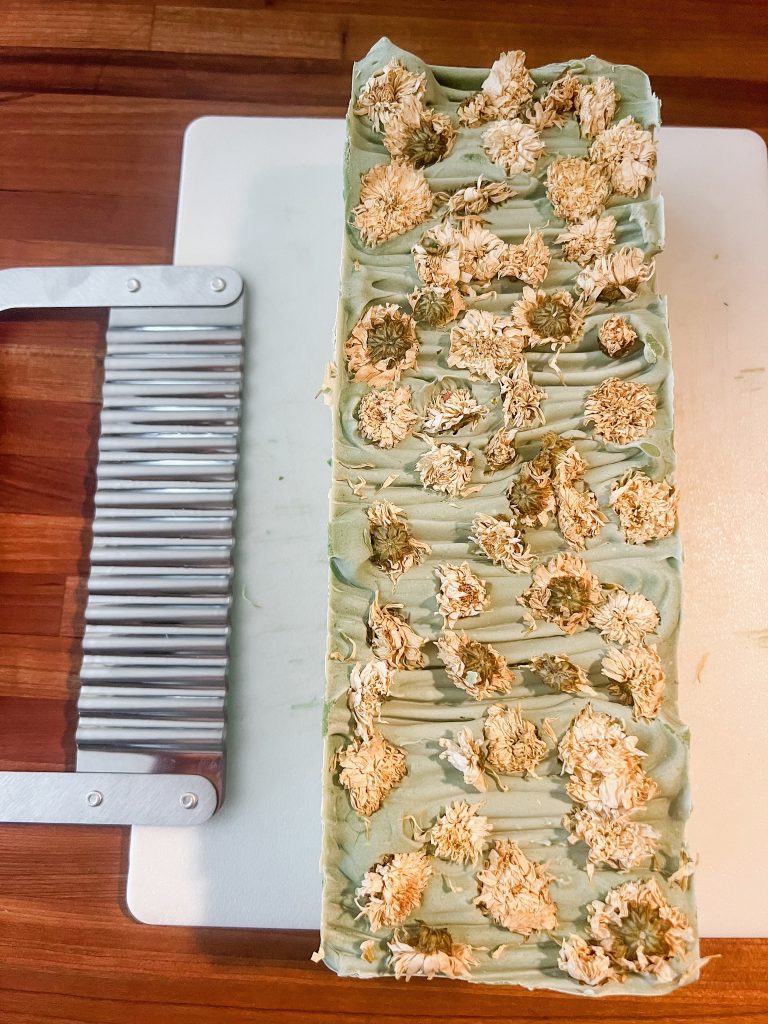
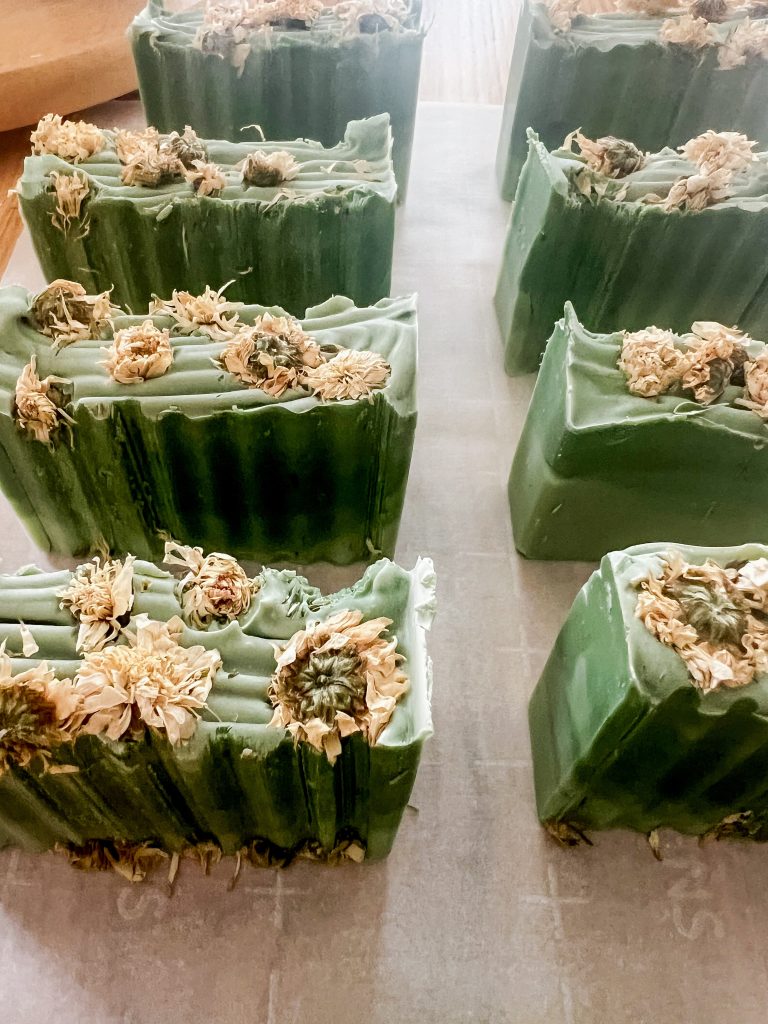
After 3 or 4 days have passed, your soap should be soft, but still firm enough to unmold and cut. Carefully pull the sides of the mold to loosen the loaf, and turn upside down to slide the mold out. Grab your soap slicer, either crinkle cut or smooth, and slice your soap into bars. These bars will need to cure and harden fully for another 2-3 weeks before they are ready to use. There you have it! You have made your first batch of cold process soap!

The beauty of making your own cold processed soaps is that you can use fragrance oils and colorants that are natural and without parabens or other hormone disrupting additives. You know exactly what is going into the products you are putting on your body and your loved ones’ bodies. The possibilities are also endless. You can find recipes using superfats like shea or olive oil that are great for dry skin. You can add natural clays that are great for acne or rashes. You are learning the power of the home apothecary and making healthy changes in your household. That is something to get excited about!
Making your Own Soap Recipes
Creating your own handmade cold process soap recipes can be tricky. If you are a first time, or even second time soap maker, I would highly recommend using a tried and true recipe, or even a soap kit, until you are very familiar with the soap making process. If you choose to make your own recipe, be sure to use a lye calculator to help you determine how much lye to add to your formula. A common cold process soap formula is (oil amount) x (saponification value) = lye needed for the recipe. A common cold process soap recipe is 33% coconut oil, 33% palm oil, and 34% olive oil. Palm oil use is a personal ethical preference, and there are other recipes that do not use palm, but this is a reliable recipe to try.
You will also need to calculate how much fragrance oil you pour into your soap batter mixture. Like we discussed before, fragrance load is a personal choice. You can choose how strong smelling your soap is, but there is a maximum load threshold you don’t want to cross. Try using a fragrance oil calculator if you need help determining fragrance amount.
Different Soap Additives For Different Uses
Handmade soaps are useful for more than simply just cleaning. Different soap recipes and soap additives can be used to help with a number of skin conditions. They can also be tailor made for specific users. You can create handmade soaps that are gentle enough to use on delicate baby skin. There are many moisturizing soap recipes, often made from shea butter, that are excellent for dry skin types.
You can substitute different fats in your homemade soaps to get different benefits. Mango butter, shea butter, hemp oil, and almond oil all have their own perks so do your research and find out what butters or fats are right for the job! There are many kinds of clay that can help oily or acne prone skin. You can also add things like sea salt,oats,aloe, and even milk which are respectively great natural remedies for skin as well. There is no limit to the customization you can do with your own soap recipes.
Fragrances and essential oils are another way that you can add flair and excitement to your handmade soaps. Fragrance oils can smell like just about anything. As long as you opt for toxin free fragrances, you are good to go! Fragrance oils can smell floral like honeysuckle, woody like campfire, musky like spices, or gourmand like your favorite desserts or coffees. Imagine lathering up with a nontoxic coffee soap to get you energized in the morning. Essential oils are also a wonderful way to add all natural fragrance to your soap projects. Essential oils have various benefits as well. Peppermint and eucalyptus are known to help reduce headaches while lavender promotes relaxation and good sleep.

Soap making can be as simple or as complicated as you want it to be. You can try your hand at melting and pour soap or dive deep into the possibilities that cold process soap making has to offer. You can choose earthy looking soap bars without any colorants, or you can add swirls of natural colorants. Choose fun, eclectic soap molds or a simple loaf mold where you cut your own bars. Add dried flowers and herbs or leave the bars purely soap. Go with the endless options that nontoxic fragrance oils have to offer, or stick with the tried and true, pure essential oils. The choices and combinations are endless. This is a wonderful art to incorporate into your home or homemaking journey. You are creating useful things that your entire family can enjoy and benefit from.