Cute Needle Felting Animal Projects for Beginners
This diy tutorial breaks down the whimsical, creative craft of needle felting using the dry felting method. Learn to create cute needle felt creations by following the step-by-step instructions below!

This post contains affiliate links, which means I make a small commission at no extra cost to you. I am an Amazon associate as well. See my full disclosure here.
When I was a little girl, I loved cute animals and crafting fuzzy critters. My little boy is an animal lover just like his mom so I thought I would make him some handmade animals to play with. If you’re on Pinterest or social media and tend to look at cozy, handmade things, you’ve probably seen a sweet needle felted animal pop up at some point. I decided to try my hand at it in real life!
While I’ve tried my hand at SEWING projects, I’ve always been fascinated with the process of needle felting because it’s much more sculptural rather than mathematical and precise. For those that don’t know, I have a background in pottery and ceramics, so I tend to gravitate towards sculptural projects that are a little less meticulous. If you’re interested in pottery tutorials, check them out HERE.
My son loves critters that you can find in the backyard, so much so that I painted an entire nursery art COLLECTION based on backyard animals. With this in mind, I decided that a frog would be a great first animal to needle felt. You can use this exact process to make any animal you’d like with a few simple changes here and there. Even if you’re a complete beginner, you should be able to follow this simple felting process with ease. This is a new craft for me as well, and these steps were easy enough to make a frog my first time needle felting!
Basic Needle Felting Materials for Beginners
To begin needle felting, all you need is some wool roving and a few simple tools. This list doesn’t include the full range of needle felting tools but is the bare bones to get you started on your journey into fibre arts!
◦ Wool Roving- for this project I’m using an earthy green wool bundle, a cream color, and black. When I think of wool, I usually imagine coarse wool. This roving is so soft!
◦ Pipe cleaners
◦ Coarse Needles
◦ Fine needles
◦ Felting mat or felting pad
◦ Wool carders (brushes)
◦ Needle felting kit (optional but this is most everything you need bundled together!)
Starting a Needle Felted Animal: Build An Armature
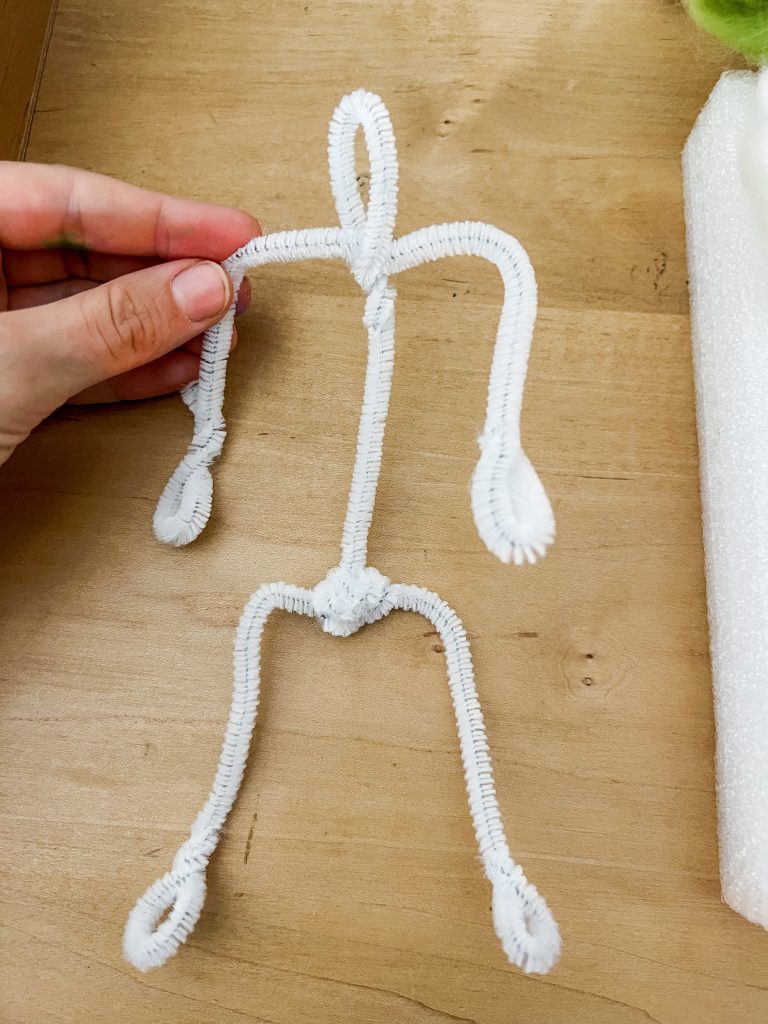
First thing we are going to do is build an armature, or skeleton, using our pipe cleaners. Creating an armature is my top tip! It gives us a starting point to sculpt and build our wool roving on. I typically use three pipe cleaners: one for the spine and head, one for the arms, and one for the legs. Once the armature is build, take some wool roving and wind it around the pipe cleaners to block out the basic silhouette of your animal. You can make your animal armature in any size, but I opted for a smaller size since I only have limited crafting time these days.
Building Up the Animal Shape
The color of your base felt body isn’t super important. As a general rule, I like to use solid white or cream roving just to build up the animal’s shape. You can purchase white in larger quantities and save your colored wool roving for the final layers of your needle felted animal. Working with your base wool, build up shapes onto the armature for legs, arms, a body and a head.
This is where the actual act of felting begins. Take your foam pad or needle felting mat and place your armature on top of it. You will need to use your coarse felting needles to stab and secure your wool to the structure as you go. This is the most important thing to grasp, otherwise it’ll just fall off of the armature. I like to use the multi needle felting tool for larger areas and a single needle for tight spaces. Be careful when using any of the special felting needles. They are powerful tools and do hurt if you accidentally stab your fingers.

When Am I Finished Needle Felting?
How do you know when the base has been felted “enough”? Your wool will go from feeling floppy and unsecured to more solid feeling. A great way to practice this is to needle felt little balls of wool. Roll some wool roving into a ball, place on your felting mat, rotate and needle it until it becomes a solid ball.
You can try this technique with all different shapes. Teardrops of varying sizes make great bodies, arms, or legs.
Creating the Animal Fur or Skin
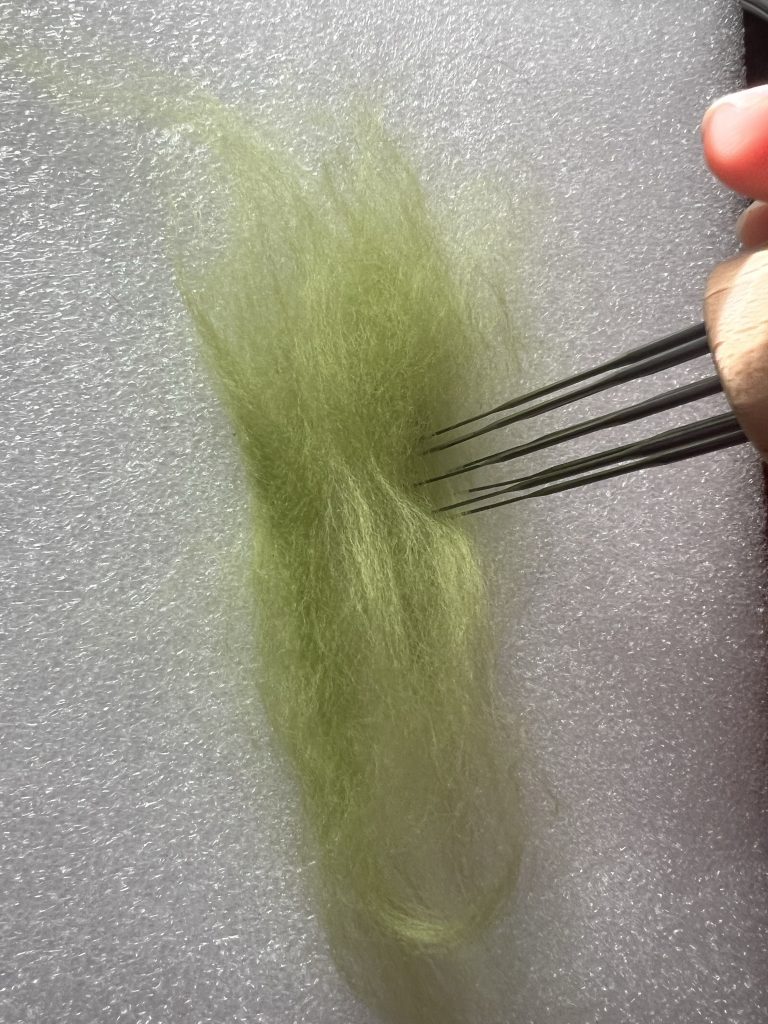
Now that the base of our frog has been sculpted onto the armature, it’s time to create the final wool covering or skin for our needle felt creation. Take your wool carders; which are basically glorified pet brushes, and brush out your green wool or final color of choice. You want to brush out a neat little rectangle of the wool, remove it from the brush, and place it on your felting mat. Next, we are essentially going to needle felt this wool into a little square sheet of wool. Using your multi needle felting tool, stab your brushed wool until it forms a solid flat piece . Remove the sheet of wool from the felting pad.
Covering The Animal With The Final Wool Fur
Take the flat piece of wool roving you just created, and cover the base of your animal. Needle it to secure it to the base. When doing this, you’ll want to make your needle work intentional. This layer will be visible when your cute needle felt frog (or whatever you decide to make) is finished.
Creating Facial Features
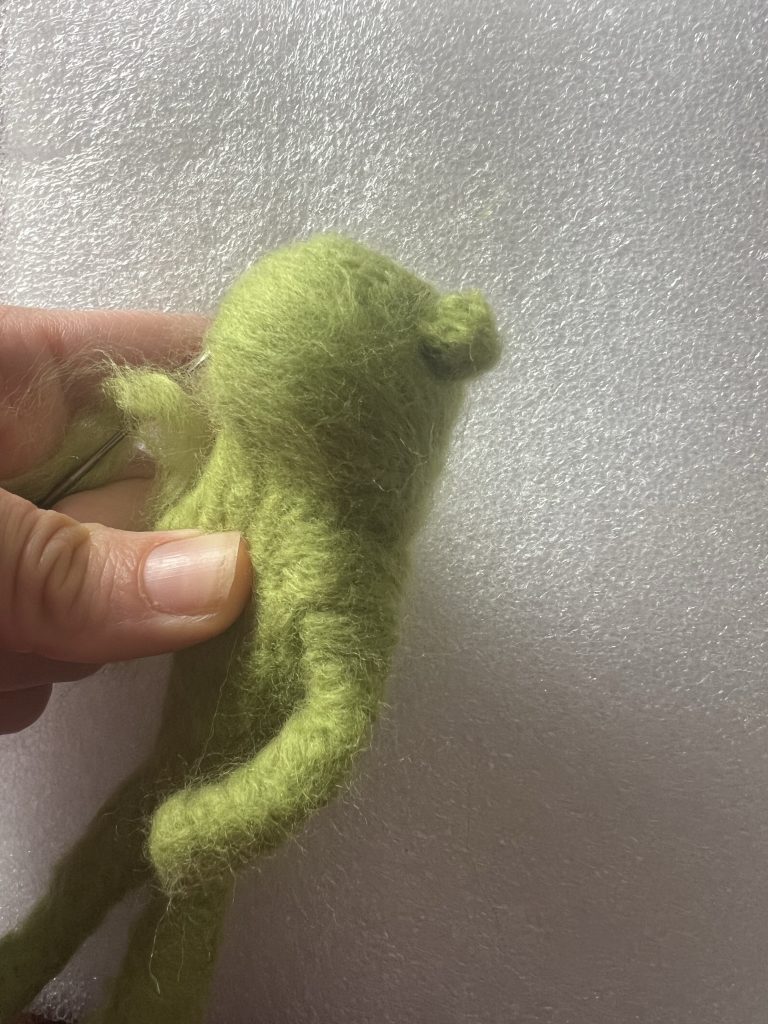
In this next step, we will begin to add dimension to the face and facial features. I took a small amount of green wool roving and placed it horizontally along the face to form the bump for the nose and mouth area. For the eyes, I rolled two even sized balls of green roving and felted each one on the felting pad. After each feature is created, I needle felted them onto the face, being intentional to make my needle marks clean. If you are making a different animal, the same process can be done to make ears, a tail, or any other elements.
For the black eyes of the frog, I rolled and felted together two evenly sized small balls of black wool roving. To attach them; I cut tiny horizontal slits in the green eye balls to create sockets. I inserted the smaller black balls of wool and felted them in place.

Finishing Touches
I decided to finish my frog with a little bit of cream colored wool for the underbelly and mouth to give him a little more character. Following the steps above for the outer covering, I felted an oval shape on my felting pad. Using scissors, I shaped up the sheet to get rid of any loose fibers. I lined up the cream sheet with my frog’s belly and mouth. Finally, I needle felted the belly onto the frog. The finishing touches are completely up to you! You can felt tiny webbed hands and feet. Maybe you want to give your frog a few dark green speckles on his face or body. If you’re going for storybook whimsy, felt or sew your new friend some cozy clothes!
If you’re interested in making other felted, fuzzy animals, there is good news! You can use the same step-by-step process to create almost any creature imaginable. Start with your basic step of making an armature or skeleton using simple shapes to make your critter. Build up the body shape using white felt or a color that would serve as a good base. Grab those wool carders and your final wool roving colors and brush out the final fur or skin for your animal. Drape and felt the final skin on. Add any dimensions or features by sculpting them separately on your wool felting mat. Attach them by felting, add any other fun details, and there you have it!
Whether you are a beginner needle felter or someone who is well versed, I hope you’ve enjoyed this needle felting project. It is only the tip of the iceberg when it comes to this whimsical craft. I hope we can learn and create more needle felting works soon! I look forward to our next project!
Blessings,
Samm