How to Create Easy Textured Paintings on Canvas
This post contains affiliate links, which means I make a small commission at no extra cost to you. See my full disclosure here.
Lately, I have been obsessing over textured, sculptural wall art. Painting is a wonderful art form, but the three dimensional part of my brain always craves something more on wood panel or canvas art. Painting with texture is a great way to get beautiful depth and visual interest. Seasoned artists and beginner painters alike can discover something new with textured paintings! I thought I would try my hand at a few texture painting techniques to see if I could breathe new life into my home that would satisfy both the painter and the sculptor within. If you’d like to make your own acrylic painting with tons of texture, follow along with this step-by-step process!
There are several ways you can achieve a textured look on your canvas art. The materials you will need depend on the look you want to achieve. There are so many interesting textures you can create with various supplies. If you like if the looks of the paintings by Vincent Van Gogh, you will need some thicker paint or layers of acrylic paint or oil paint to build up that beautiful, whimsical texture. If you’re wanting an earthier, more sculptural look to your textured canvas or wood panel, you may want to use joint compound. For my canvas art, I will be using joint compound.
Materials:
-canvas or wood panel
-acrylic paint or oil paint
-joint compound
-piping bag
-palette knife
-paintbrush
-gloves (optional but recommended)
Joint compound is, of course, drywall mud, but its uses are not limited to construction sites! Think of it like clay that sticks to the wall. You can physically sculpt the joint compound on your canvas using different tools like palette knives, piping bags, paint brushes, or even your hands (always were gloves). I wanted to create a sculptural botanical painting for our living room, so I chose joint compound for its workability. I wanted to transfer my clay knowledge to a wood panel my husband built.
If you are going the Van Gogh route, you will be building texture with your paint itself. Squeeze the tubes directly on the canvas, spackle the paint on with a palette knife, or paint thicker paint with a paintbrush. For joint compound art like mine, we will be creating the dimension and texture with the drywall mud. Create abstract textures with a palette knife or use a piping bag to “draw” with the joint compound. You can add texture to the entire canvas or just a portion. Smooth out any unwanted blemishes or lumps with water and a soft paint brush.
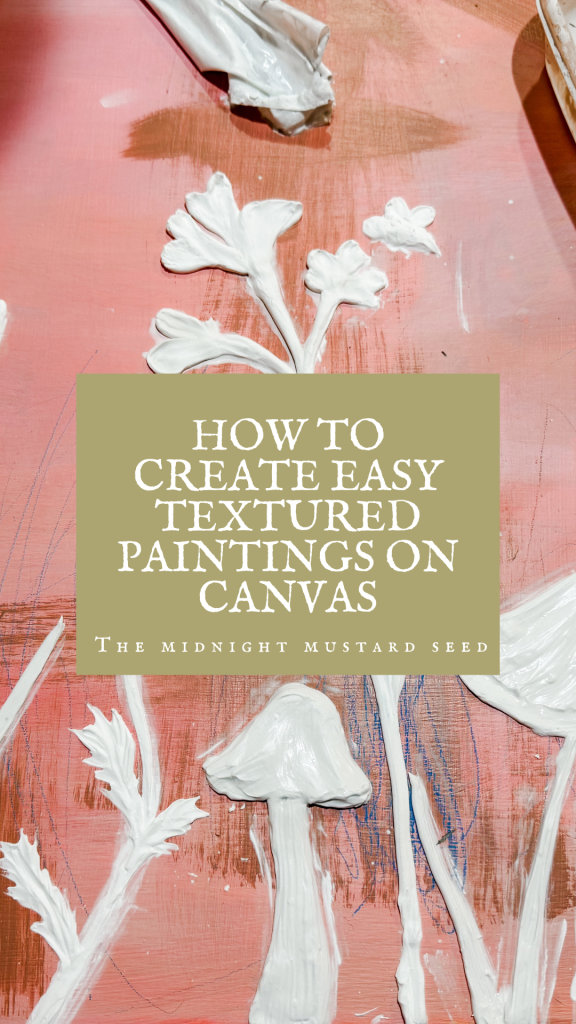
The first thing I did was prime my wood panel. with my colored ground-pink. You can prime your canvas or panel in any color you’d like. There are little colored pencil marks on my panel made by my toddler that I fell in love with so I will be preserving that little detail as well. Colored pencil toddler markings not required but are very much adored over here! Once your canvas is primed and dried, you are ready to add texture!
For the next step, we are going to add texture to our canvas or panel. If you want to draw with the joint compound, put some in a piping bag. I have piped the basic shapes and dimensions of my botanicals will a piping bag as seen below. Cut a small hole in the top and use it to draw your image onto the canvas. We will need to work in thin layers so that the joint compound doesn’t crack. If it begins to crack as it dries, don’t panic. It can be patched by adding a little more joint compound. Use some water and a paintbrush to smooth or sharpen your compound as desired.
Next, use your wet paint brush to shapen and smooth out your joint compound as desired. We will make several passes through our artwork to build that texture and depth even more. Here I have the basic forms of the mushrooms and botanical, but I will pipe or paint on small details and shapes will more compound in the second layer.
Once you are happy with the basic sculpture or texture of the canvas, it is time to do the finishing touches. Using sandpaper or a damp rag, you can smooth any unwanted lumps or sharp edges. You can also remove any unwanted dots of joint compound that don’t belong on your canvas. When the texture is just right, it is time to paint.
You can paint your textured canvas however you like! Paint botanicals like you would traditionally and colorfully, or go for an earthy, monochromatic look with all white paint like I did here. Paint abstract textures with abstract washes of color. The options are endless and are simply a matter of taste.
Textured paintings are such a fun art project and can be as simple or as complicated as you’d like. It’s a great way to add a little bit of interest on your walls if you’re looking for a quick, easy way to cozy them up. Create your own diy sculpture or just jazz up traditional paintings with a little added depth and texture. I hope this post has helped you and inspired you to create textured paintings of your own! It doesn’t have to be perfect! Just have fun experimenting and see what you get!